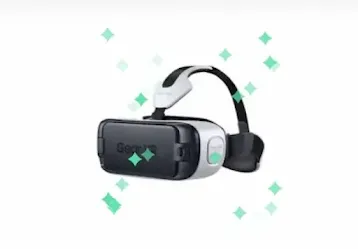
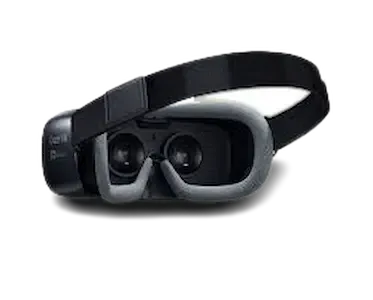
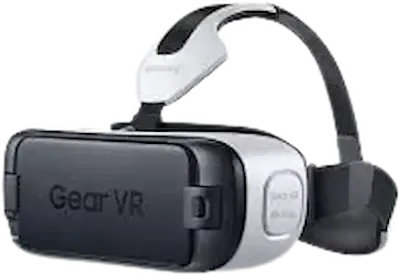
Samsung Gear VR; We'll look at the top five hidden features on the Samsung Gear VR in the coming weeks.
What can I do with Samsung Gear VR?
- Ability to save demo material included with your Gear VR to any micro SD card.
- you can watch downloaded VR movies on Oculus 2.
- Connect a Bluetooth controller gamepad keyboard to your Gear VR to play games.
- With the Samsung Gear VR, you can use any Google cardboard virtual reality app.
1. Ability to save demo material included with your Gear VR to any micro SD card.
At number five, you can save all of the demo material that came with your Samsung Gear VR to any microSD card you want.
This is especially useful for those of you who already have a high capacity microSD card in your Note 4.
Now, this may not sound like a didn't feature, but it's not as simple as creating a new folder on the microSD card you want to use and then moving the Occulus material into that folder.
If you try that, as I did, you won't see any of your demo material when you turn on the Gear VR because the oculus software searches in the root directory of your microSD card.
If you don't already know, a root directory is simply the topmost folder on your microSD card. For example, if you open the my files app on your Note 4, the root folder will be the first thing you see after tapping SD card.
To successfully move the Occulus demo material, simply copy the files from the micro SD card that came with your device to this location without creating any custom folder names.
"Also read: apple-watch-series-7-review-price"
The first method is to insert the microSD card that came with your gear VR into your note 4 and copy the files from that micro SD card to your phone's internal storage, then swap out the micro SD card with the one you want to use and move the demo files from the phone storage to the root folder of that microSD card.
If you're going to remove a microSD card while the phone is still turned on, make sure you first unmount the microSD card in your settings.
If you don't have enough space on your phone's internal storage to use the first method, you could also save the Occulus demo material to your computer.
Then transfer the files from your computer to the microSD card you want to use to transfer the files to your computer Insert the microSD card into the SD card adapter included with your equipment virtual realty.
Then plug the adapter into your computer or insert the micro SD card into your note 4 and connect it to your computer via a USB cable To a Windows-based computer, Android phones resemble external hard drives.
So transferring the files should be fairly self-explanatory on a Mac; you'll need to download an app called Android file transfer for your Mac.
After you've transferred the files to your computer, simply replace the microSD card with the demo material with the microSD card.
You'll use in your note 4 and transfer the files to its root folder, after which all of your oculis demo material will be accessible on your own hidden microSD card.
"Also read: Apple Watch Ultra impressions and review"
2. you can watch downloaded virtual realty movies on Oculus 2
The fourth feature You can watch any movie that you have a digital copy of in the oculus cinema and have thumbnails for those movies by copying whatever movie you want to sd card oculus movies.
This will cause your movies to appear in the oculus cinema's my video section, but you will still lack a thumbnail.
To add a thumbnail, add a PNG image with the exact same title as the movie title to the same folder as your movie.
If all you can find are JPEGs or other non-PNG formats, simply open whatever image you have in Microsoft Paint, go to file save as, and in the pop-up window, change the save type to PNG.
Simply place that image in the my videos folder, and your video will appear as a thumbnail in the oculus cinema. On a Mac, converting an image to a PNG image is just as simple.
I don't have a Mac to demonstrate this, so I'll just list the steps. One quick disclaimer: open your image in preview, select save as, and then PNG.
If you add any movies with a higher resolution than 1080p, you will only be able to watch them in the void theater, which is just a big screen in front of you with nothing else around it.
You can also add stereoscopic 3D movies to the Oculus Cinema, but this requires an additional step. After saving your 3D movie and its PNG file to the my videos folder, you must add a text file. The title of the document must correspond to the title of the document.
You must include this text exactly, including the curly brackets, in the text file where you provided the movie. This text will appear below the thumbnail for the video in the oculus cinema and can be whatever you want.
In case you were wondering, your 2d videos do not require this text file to have a title generated for them; if a 2d video does not have a text file, the title will be generated directly from the video file.
"Also read: Carbinox Smart watch Fitness Tracker for iphone"
However, you can add a text file for a 2d video if you want the title in the oculus cinema to be different than the title in the movie file. I'm not sure why you wouldn't just change the movie file's title, but the text file method is available to you.
The next step for 3d videos is the most important; you must change the format section of the text file. There are five types of 3d to choose from: 3d 3d LR 3d lrf 3d t b— and 3d TBF 3d and 3d lr are both for 3d videos that are split side-by-side 3d lr f stands for 3d left-right fullscreen.
It has the same split as 3d and 3d LR, but it is in full screen format. 3d TB and 3d TBF are the same as three DLR and three DLF, with the only difference being that these videos are split top and bottom rather than left and right.
To determine which type of 3d your movie uses, simply play it on your computer and look at how the videos are split. If it is split side by side, it is one of the first three types.
If it splits top and bottom, it's one of the last two types; otherwise, you'll have to use your discretion to determine whether it's a full-screen movie.
In either case, you can simply guess one way or the other and then test it out in the oculus cinema. If the video is stretched or squished, you know you chose the wrong one. The category is the next section of the text file.
Use this field if you want your video to appear somewhere other than the oculus cinema's my videos tab.
You have the choice of multi-screen trailers or my videos. If you enter anything other than those three options in the category text field, the video will be redirected to the my videos tab.
Finally, there is the theater option. I believe this restricts the movie to a specific theater, such as the moon theater or the home theater, but I haven't been able to get this feature to work.
I'm not sure why you'd want to limit which theater you can watch one of your movies in, so you can leave this section blank, but if I figure out how to use it, I'll be sure to mention it.
Once you've finished configuring the text file, save it in the same folder as your movie and you'll be good to go.
One more thing, due to permission issues, you may need to edit the text file in a different folder first, then move the text file into the folder with your movie in it.
Just add the multi-screen movie to sdcard oculis movies multi-screen, then add a text file, just like with the 3d movies.
The only difference here is that you would put multi-screen in the category section and 2d in the format section of the text file unless your multi-screen movie is also 3d.
"Also read: TOP 5 Rugged and Waterproof Smart Watches in 2022"
In case you were wondering, any of your regular videos could also be played in the multi screen theater by changing the category section of their text file to multi screen.
However, I would not recommend this because it simply stretches your video across three screens and squishes everything hidden.
3. Connect a Bluetooth controller gamepad keyboard to your Gear VR to play games.
Third, you can connect almost any Bluetooth controller, gamepad, keyboard, and so on to your Note 4 and use it with the Gear VR to play games and navigate menus.
You can use the Gear virtual realty with your Note 4 as long as you have a bluetooth input device connected to it. A keyboard, for example, has some limitations unless you customize certain keys to enable character movement.
The Gear VR can be streamed to any TV equipped with a Chromecast. If you already own a play pad Pro by Nyko or a Nintendo Wii controller, you won't need to purchase Samsung's controller.
Simply open the Chromecast app on your Note 4 and tap the three bars in the top left corner to access the cast screen.
Now just put the note 4 into the gear VR and everyone will see exactly what you are seeing this should also work with any miracast dongle but I wasn't personally able to test that time.
4. With the Samsung Gear VR, you can use any Google cardboard virtual reality app.
The number one hidden feature on the Samsung gear VR is the ability to use any Google cardboard virtual reality app with this headset.
Simply launch any Google cardboard virtual reality app on your Note 4 before inserting the Note 4 into the gear VR without connecting the USB on the gear VR.
Lift the USB connector before sliding the Note 4 into place. Don't worry about bending the USB connector because it easily rotates out of the way without putting additional strain on the connector.
The only thing you're missing now is the magnet required for some Google cardboard apps. If you don't have an official Google cardboard magnet, you can simply use a strong magnet from your refrigerator.
Because not every magnet is strong enough, you may need to experiment with a few different fridge magnets before you find one that works.
Once you've obtained a magnet, simply shake it near the top of the phone to make a selection, being careful not to smack the camera lens.
The magnet will not harm the camera, but hitting the lens too hard may cause a scratch. I'll remove the Note 4 from the Gear VR so you can see what's going on on the screen here in the Google cardboard app.
If I wanted to select something like Google Earth, I would simply look at Google Earth and shake the magnet once near the top of the phone.
"Also read: Carbinox Watch Review "
If that doesn't work, try shaking the magnet closer to the phone. If that still doesn't work, you'll need a more powerful magnet, which you can purchase at your local electronics store, eBay, or Amazon.
So there you have it, the top 5 hidden features on the Samsung Gear VR. Let me know what you think about it, do you think it's cool, do you think it's gimmicky, have you tried one, are you going to buy one, or do you have any questions about it.


0 Comments